How to Record a Teams Meeting?
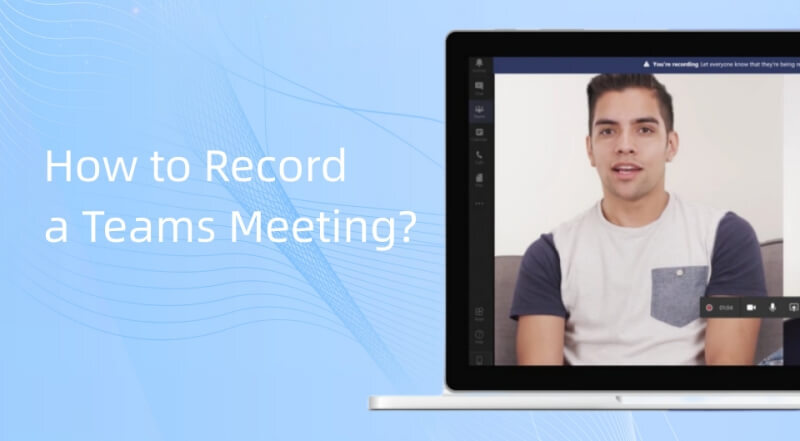
Because of the COVID-19 epidemic, more and more businesses are now working from home, necessitating the adoption of various remote work applications. One of them is Microsoft Teams, utilized for corporate meetings to connect with employees from multiple locations, which has become a commercial need. In this case, you may need to record Teams meeting to take important notes or double-check meeting contents afterward.
Learning how to record on Teams can be challenging and time-consuming for some managers and supervisors who aren't tech-savvy. That is why we produced this tutorial on recording Teams meetings using various programs. Continue reading to find out which screen recorder is ideal for you!
You will learn about excellent screen recorder applications that you can use to record a Team's meeting on your PC or mobile device without being notified. Let us all read together, "can you record a Teams meeting?"
Who can record a Teams meeting?
In Microsoft Teams, only the person who scheduled the meeting or the team's owner can start and stop a meeting recording. You should be the owner of the group or the person who organized the meeting to have the option to start or stop a recording.
It is important to note that to record teams meeting, all participants must consent for the session to get recorded. You can obtain this consent through the Teams application or the consent prompt that appears when the meeting starts.
Suppose you are the owner of the team or the person who scheduled the meeting, and you do not see the option to start a recording. In that case, the recording feature could be inactive by your organization's administrator. Thus, you will need to contact your administrator to request that the team's call recording be active.
Bonus Tip: Sleek 4K PTZ webcam for a better Teams meeting experience
OBSBOT Tiny 2 webcam is a high-quality camera built with video conferencing and streaming apps for recording team meetings. It has a 4K image sensor that can capture ultra-high-definition video at up to 3840 x 2160 resolution. The camera also boasts a 150-degree field of vision wide-angle lens, allowing it to capture a large area without panning or zooming.
OBSBOT Tiny 2 webcam's compact size and lightweight construction are two of its most notable qualities. The camera is about 47*44*62.02mm and weighs 95.6g, making it portable and easy to take wherever you go. It also includes a flexible stand that allows you to set it at various angles and on various surfaces.
In addition to high-quality video recording, the OBSBOT Tiny 2 camera includes a built-in microphone and noise-cancellation technology, allowing you to capture clear audio during meetings and broadcasts. It also features a low-light adjustment mode that aids image quality in low-light circumstances.
Overall, the OBSBOT Tiny 2 webcam is a small and adaptable camera that you can use for several purposes, such as video conferencing, streaming, and more. Its high-quality video and audio capture capabilities make it an excellent choice for professionals looking for a dependable and high-performance camera.
How to record a Teams meeting on PC?
Want to learn how to record on Microsoft teams on a PC? Follow the detailed steps for recording a Teams meeting below:
Prerequisite to record a Microsoft Teams meeting
To record a Microsoft Teams meeting, you will need to have the following:
- A Microsoft Teams account: If you don't have a Microsoft Teams account, you can sign up for a free trial or purchase a subscription. The recording option is not available in the entirely free Microsoft Teams account.
- Permission to record the meeting: You will need to be the organizer or presenter of the conference to be able to start and stop the recording. If you are not the organizer or presenter, you will need to ask them to create the recording.
- The latest version of the Microsoft Teams app: Ensure you have the newest version of the Microsoft Teams app installed on your computer or mobile device. You can download the app from the Microsoft Teams website or your device's app store.
- A device with a microphone and camera: You will need a microphone and camera to participate in the meeting and record it. Most laptops and smartphones have built-in microphones and cameras. Still, you may need an external microphone or camera if your device does not have good-quality audio or video.
- A stable Internet connection: To record a Microsoft Teams meeting, you will need a stable Internet connection with sufficient bandwidth. The recording may need better quality or work if you have a slow or bad Internet connection.
Method 1. Record a meeting in Teams with the built-in recorder
You should thoroughly understand how to record a meeting in Teams as a manager or leader of a remote team. Fortunately, the recording options in MS Teams are simple to use and easy to discover. You'll need an Office 365 Enterprise E1, E3, or E5 license to use Teams.
When you start recording a meeting, you enable live transcriptions (if the IT admin allows transcriptions).
- Begin or participate in the meeting.
- Select More options … > Start recording from the meeting controls.
- Everyone in the room is informed that recording and transcribing have begun.
It would be best if you remember that even after the organizer has departed, the Teams meeting will continue to record. When everyone has left the meeting, the recording will end. If a user fails to exit the session, the recording will terminate after four hours.
Method 2. Record a Teams meeting secretly with OBS Studio
You can record meetings in teams, like an online presentation, to re-watch them later or to share with colleagues. This can be challenging to accomplish from within the presenting tool. Such meetings are easy to record using OBS Studio, a free, open-source program. Let us look at the steps below.
- Launch your MS Teams meeting.
- Download and install OBS Studio on your computer.
- Start OBS Studio.
- In OBS Studio, click the "+" button under the "Sources" section.
- From the menu, select "Window Capture".
- In the "Create New" window that appears, give the capture a name (e.g., "Teams Meeting"), and then click the "Create" button.
- In the "Properties" window that appears, select the Microsoft Teams window from the dropdown menu under "Window".
- Click the "OK" button to close the "Properties" window.
- Start the Teams meeting.
- In OBS Studio, click the "Start Recording" button.
Method 3. Record a Teams meeting on Windows with Xbox Game Bar
To record a Microsoft Teams meeting on a Windows computer using Xbox Game Bar, follow these steps:
- Open the Microsoft Teams app and join the meeting you want to record.
- Press the "Windows" + "ALT" + "R" keys on your keyboard to open Xbox Game Bar.
- The Xbox Game Bar starts recording automatically.
- To stop, press the red button.
How to record a Teams meeting on mobile?
To record a Microsoft Teams meeting on your mobile device, follow these steps:
- Open the Microsoft Teams app and join the meeting you want to record.
- Tap the "More options" (three dots) button in the bottom right corner of the screen.
- Tap "Start recording".
- A banner will appear at the top of the screen to confirm that the recording has started. The banner will also show the elapsed recording time.
- To stop the recording, tap the banner and then tap "Stop recording".
- The recording will be saved to your device and accessed from the "Recordings" tab in the app.
Note: You should be the organizer or presenter of the meeting to be able to start and stop the recording. If you are not the organizer or presenter, you will need to ask them to start the recording for you.
Where do Teams recordings go?
Depending on the kind of meeting, the recording of team meetings will be in OneDrive or SharePoint.
Remember that a recording will expire and be destroyed automatically after a predetermined amount of time. Your admin determines how long it's accessible, but you can modify or delete the expiration date for every individual recording.
You can adjust permissions and permit those without access to see a meeting recording if your organization still stores recordings in Microsoft Stream rather than OneDrive or SharePoint and you are the meeting owner.
How to manage the expiration of a Teams meeting recording?
Microsoft recently updated the default expiration duration of team meeting recordings to 60 days. However, it allows you to change or modify the expiration date manually.
When the auto-expiration option is activated, a yellow banner like the following will display beneath all Team meeting recordings.
Where to locate the settings for meeting expiration
The Teams admin center is where you can quickly discover the meeting auto-expiration settings. The recording & transcription settings include auto-expiration options.
- Open the Teams administration area.
- Go to "Meetings" > meeting regulations.
- Choose the global meeting policy that is in effect for your Teams environment. Click edit.
- Go to Recording & Transcription at the bottom.
The recording & transcription area of the meeting policies in the Teams admin center is where you can find the Default expiration time and set yours.
Users in Microsoft Teams can change the team's recording storage and permissions settings. Usually, Teams meeting recordings from channels and in-chat meetings are automatically uploaded to SharePoint and OneDrive, respectively.
Notably, the recording will only be automatically accessible to meeting hosts and members of the same Teams organization. Additionally, they are the only users who can initiate and terminate meetings; visitors and outside users can only participate in meetings.
Other important notes for Team Meeting recordings
You can establish rules for the downloading of channel meeting recordings. Channel owners will have full access to the recordings in their SharePoint or OneDrive folders if an admin "limits" downloads, while channel members will only have "read" access online.
There are expiration dates for every meeting that allows organizations to decide how long a recording should be accessible before being deleted from the Teams interface. Visit the recording in SharePoint or OneDrive and select the "details" section to view the recording's expiration date. Users can choose a specific expiration date or disable expiration altogether by selecting the dropdown box provided next to the expiration date.
If you transcriptionally record a team's meeting, the file and closed captions will instantly connect to the Teams Meeting. The link to the closed captions functionality will often last the file's duration. However, if a file is a copy inside the same OneDrive or SharePoint account, it may be broken.
Conclusion
Thus, we learned recording a Microsoft Teams meeting is a simple and convenient way to capture essential discussions and presentations for future reference. To register a session, click the "More actions" button in the top right corner of the Teams window and select "Start recording". The Teams recording will auto-save to the "Recordings" folder in your chat history, where you can access it anytime. You can also share the recording by copying and pasting the link into an email or chat message. The recordings expire after 60 days, but you can change the expiration date if needed.
Overall, the recording feature in Teams is a valuable tool for professionals to record meetings in teams and review important meetings and discussions.
